Apache Hadoop is a framework for distributed computing,
based on Hadoop Distributed File System (HDFS); it offers a solution for
large-scale data containment and processing by incorporating a system to
distribute the data keeping, its retrieval and processing to inexpensive
hardware.
Fancy as it seems, deploying and configuring
Hadoop, unfortunately isn't a trivial process. It requires big effort, time and
expertise.
In this post, we will try to demonstrate how
to setup a single-node cluster of Hadoop on a Ubuntu Linux virtual machine,
purely for experimental purposes. If done correctly, this might be helpful for
large-scale deployments. Let's get started.
Step 1: Getting Ubuntu VM ready
First step is to install Oracle VirtualBox on your machine and create an Ubuntu (13.04) Virtual machine.
After successful creation of Virtual Machine
(VM), launch and update your OS on VM using the following combination of
commands on Terminal (Ctrl+T):
# Update your OS using aptitude commands
$ sudo apt-get update
$ sudo apt-get upgrade

Step 2: Installing JDK
Hadoop is designed on Java and hence requires
Java Development Kit (JDK) to run. Although Ubuntu comes with built-in Open
JDK, but it is recommended that you use Oracle’s JDK. Here is a bunch of
commands, which will do that:
$ sudo
add-apt-repository ppa:webupd8team/java
$
sudo apt-get update
$ sudo
apt-get install oracle-java7-installer
OR (if the above
doesn’t work)
$ sudo update-java-alternatives -s java-7-oracle
$ sudo apt-get install oracle-java7-set-default
$ java –version
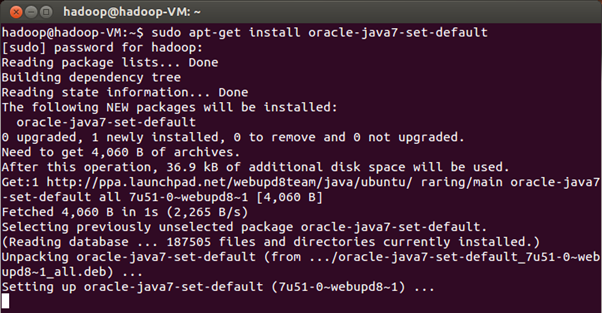
If the installation was successful, the last
command should print the version of JDK you have installed.
Step 3: Setting up SSH
We need to configure Secure Shell (SSH), which
is required by Hadoop Cluster to manage its nodes. In order to do so, install
Open SSH Server first:
$ sudo apt-get install openssh-server

Now you need to create a public key for SSH; execute
the following command:
# Generate key using RSA algorithm and empty password
$ ssh-keygen -t rsa -P ""
The encryption algorithm used here is RSA and the empty space after –P switch indicates that we are creating
a password less public key (learn more here), since this setup is for experimental
purpose. On production environment, you should always enter a password. Next,
enable SSH access to your local machine with the following command:
$ cat /home/hadoop/.ssh/id_rsa.pub >> /home/hadoop/.ssh/authorized_keys
Test the ssh service by ssh’ing localhost
(your own VM):
$ ssh localhost

Your Ubuntu Linux is now configured and ready
for Hadoop installation.
Step 4: Installing Hadoop
Download Hadoop from recommended mirror. You can either download/extract a zipped file (usually
a tar file) to any directory you wish to install in (for example /usr/local/hadoop),
or download a debian installer for Ubuntu and skip some configuration steps.
Here we will use zipped file, version 1.2.1-1.
When the file is downloaded, extract it to a
folder in home directory, like Documents. Now open terminal (Ctrl+Alt+T) and
copy the extracted files to /usr/local/ directory:
$ cd Documents/
# Copy Hadoop to destination directory
$ sudo cp –R hadoop_1.2.1/ /usr/local/
$ cd /usr/local/
$ ls
# Rename the directory for ease
$ sudo mv hadoop_1.2.1 hadoop

You also need to change the ownership of Hadoop’s
directory to the user “hadoop” recursively. Do so by executing:
$ cd /usr/local/
# Recursively assign ownership to [user]:[group]
$ sudo chown –R hadoop:hadoop hadoop

Step 5: Setting up Environment Variables
Next, we need to set up environment variables.
On Ubuntu command (Alt+F2) type “gksu nautilus” to launch file manager with
root privileges.
Locate .bashrc file in /home/hadoop/ (or
whatever the username is). Open this file and add the following lines at the
end:
# Set Environment variables
export JAVA_HOME=/usr/lib/jvm/java-7-oracle
export HADOOP_HOME=/usr/local/hadoop
export PATH=$PATH:$HADOOP_HOME/bin
Save and exit the file.

Don’t just close the Explorer Window; you need to
change JAVA_HOME to “/usr/lib/jvm/java-7-oracle” in another file – /usr/local/hadoop/conf/hadoop-env.sh.
In this file, you can define some parameters to Hadoop’s daemon process, like
heap size, or storing log files, etc.

We will now configure Hadoop file system (HDFS), where
Hadoop will store data. First, create a directory for temporary files and point
Hadoop towards it in its configuration to store temporary files. Go on and
create a directory in /home/hadoop/hadoop/tmp using mkdir command in terminal
(do not use sudo, or you’ll have to explicitly define permissions)
Step 6: Adding Properties
We need to define some essential properties in difference configuration files. First, we edit the /usr/local/hadoop/conf/core-site.xml
file (if you are using terminal, you can edit using $ sudo nano /usr/local/hadoop/conf/core-site.xml). We need to add two properties, one to define the
directory where HDFS will create its temporary files and the other to define
its address and port, the file system will map to. Add the following properties
at the end of this xml file just before the closing tag </configuration>:
<property>
<name>hadoop.tmp.dir</name>
<value>/home/hadoop/hadoop/tmp</value>
</property><property>
<name>fs.default.name</name>
<value>hdfs://localhost:54310</value>
</property>

In the same directory, edit mapred-site.xml. Add
property “mapred.job.tracker”:
<property>
<name>mapred.job.tracker</name>
<value>localhost:54311</value>
</property>

Similarly, we will edit hdfs-site.xml file
and set the file replication, i.e. the number of copies of a file that the file
system will store. We only need single copy for now, but creating replicas is strongly
recommended for production systems:
<property>
<name>dfs.replication</name>
<value>1</value>
</property>
Step 7: Starting Hadoop Services
We will now format the HDFS file system. This
is required in order to remove all data in the cluster for initial
installation:
$ hadoop namenode –format

Finally, start the Hadoop cluster on a single
node. This will start some services (Namenode, Datanode, Jobtracker and
Tasktracker):
$ start-all.sh

That’s it. You have configured Hadoop on a
single-node cluster. The real thing is what you do with it – soon to come.
Wow that's a wonderfull blog having all details & helpful. Hadoop cluster NJ
ReplyDelete